Moose Academy Plus: A Comprehensive Guide to Backing Natural Cabochons (Three Options and Techniques)
Backing natural turquoise cabochons is a vital step in the lapidary process, providing stability and enhancing the appearance of your turquoise gem. In this guide, we'll explore three options for backing materials and discuss the pros and cons of each. In addition, we'll also talk about the essential tools and techniques to ensure a successful turquoise cabochon backing project!
First, let’s talk about the tools:

- Use disposable mixing bowls like paper or plastic, as backing material may harden, making the bowl unusable.
- We recommend tools such as a spatula for easy cleanup or a disposable wooden stick or picnic spoon. This way, you can throw them away easily after.

Backing Material choices: (Not in order of preference)
Option one: Devcon Plastic Steel Putty

This option is the best for individually backed stones as Devcon is a harder material. You can find the official instructions for using Devcon on their website but we will explain a few key points here as well.

Mixing: Mix ratio - weight 9:1, by Volume 2.5:1
Plastic Steel Putty is formulated to be a dense mix that can be applied easily to the back of your slabs without running or sagging. Add the hardener to the resin and mix thoroughly in a mixing bowl using a spatula.
Application:
For best results, the product should be kept, mixed, and applied at room temperature.
Mix for at least 3-5 minutes so the material blends well. Once mixed thoroughly, apply Devcon mix right away to the back of your slabs to avoid the mix hardening and becoming harder to apply. When applying it to the back of your stones, press firmly to ensure maximum surface contact and avoid trapping air.
Here is a video of someone working on Devcon but they mix it on a flat surface which is OK as well. We encourage you to try different ways to work with your backing and find what is the best method for your workflow.
Option two: Fiberglass resin with clay powder and cement color (As seen in our Moose Academy course)
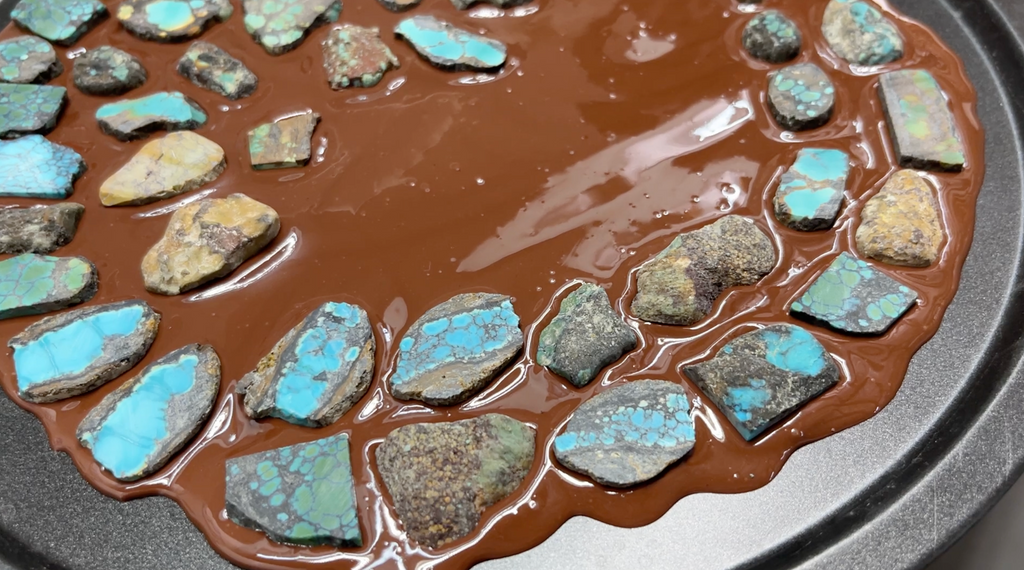
The ratio is about 1:1 OR 2 part resin and 1 part clay powder depending on your material but you can try out different ratios to test the durability and time taken to dry. This option can be used to back a group of stones as shown as the mix is more liquidish than Devcon.

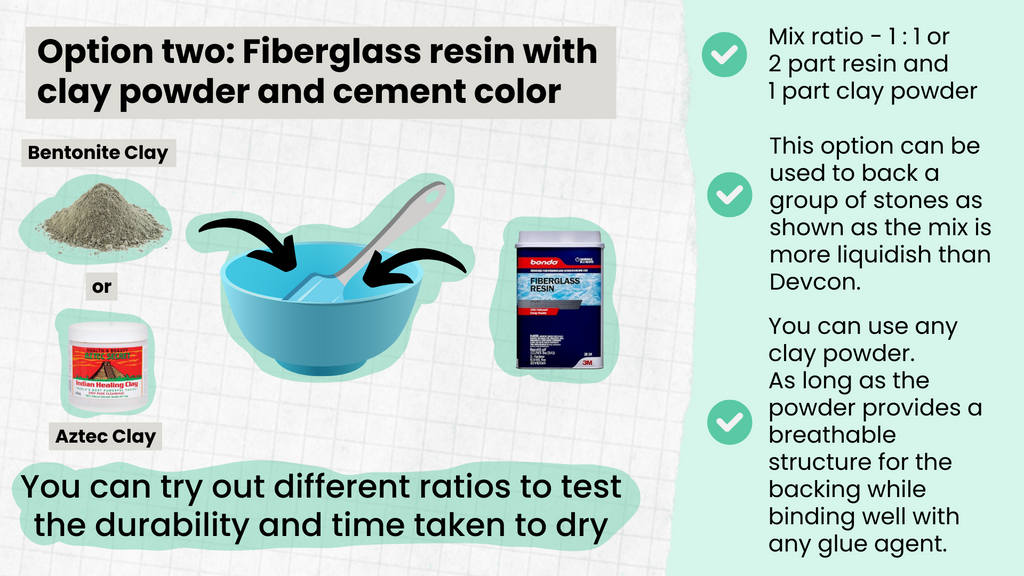
For the clay powder, you can use any clay powder, even the facial clay powder or Bentonite Clay. As long as the powder provides a breathable structure for the backing while binding well with any glue agent. Search online or in your local market to find any affordable clay powder.
For fiberglass resin, there is a brand name Bondo you can try out but any brand would work.

Option three:
You can also try a 2-part epoxy mix with 1 part clay powder or bentonite clay. The key is to wait until everything is dry from the inside out, otherwise, it will cause trouble when you begin shaping your slab.


Now, here are some essential tips for the materials:
Fiberglass resin would dry faster than the Devcon or Epoxy option. Epoxy will dry faster than Devcon.
Disclaimer: We do not want to suggest any products as we do not have any affiliation with those brands. But you can choose your own brand and do experiments, as the backing would always work regardless of brand. We do want to leave space for experiments and failures; for instance, some people love to use a different coloring to the backing, and some do not. You can invent your own backing as well.
Next, how to effectively work on backing:
Let’s find a flat surface to place your raw backing material to begin with.
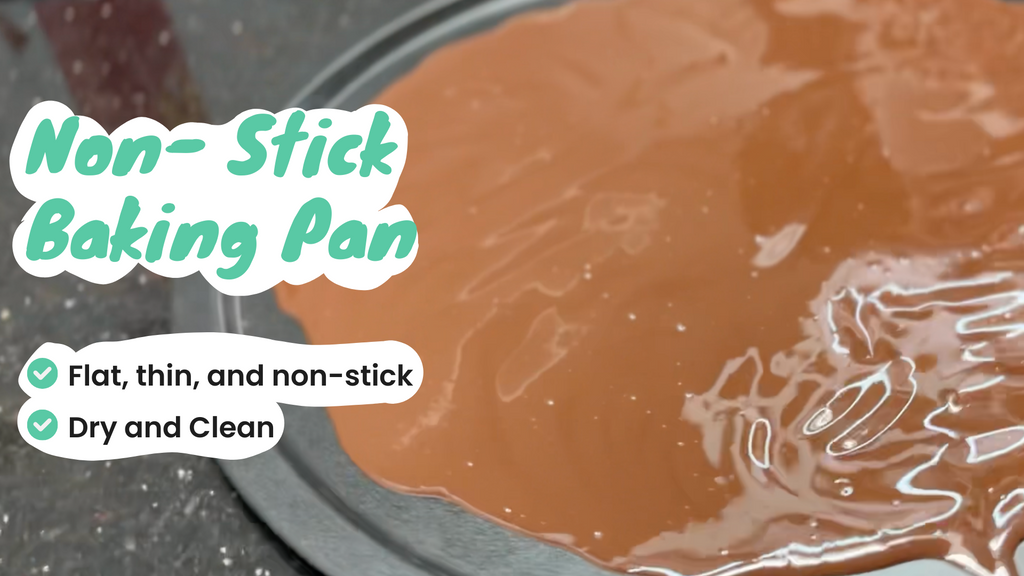
With smaller projects, we can use the option shown in Moose Academy video: a non-stick baking pan. It must be flat, thin, and non-stick. Clean it thoroughly before pouring any material onto the pan. Make sure it is dry and clean before you work on the pan. The reason we would need it flat is that it won’t leave any mark on the back of your backing. We would need the pan to be thin so we can pop the backing off it easily by bending the pan a bit, once the backing is dry and ready to come off it.
With larger projects, you can find a bigger flat working surface to place your backing individually or as a group. The most affordable option is to place the freshly backed stone onto a flat smooth plastic bag - we love a large kitchen trash bag.
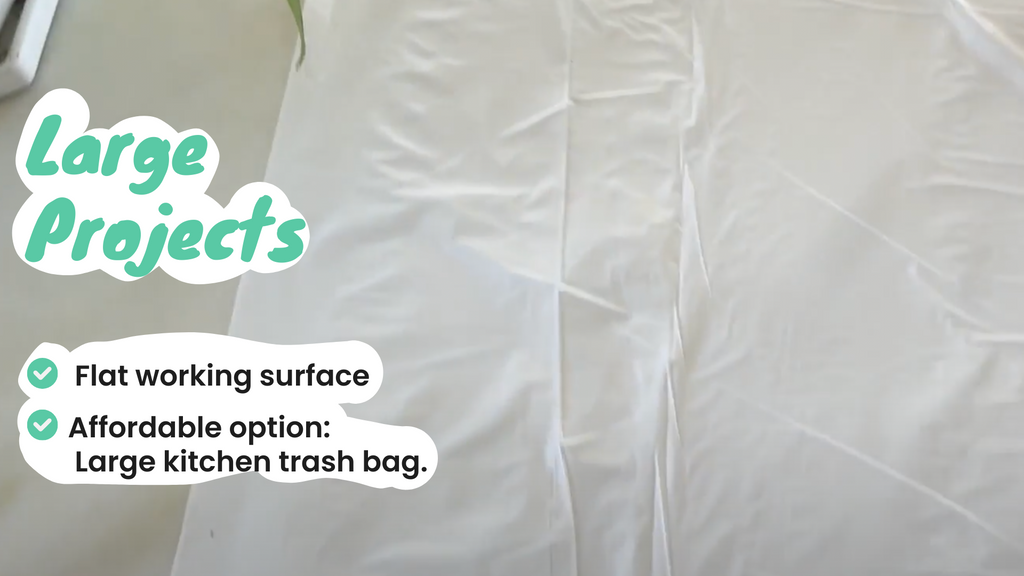
Once the backing is dry, you need to peel off the bag from the stone, instead of needing to pop the stones off a harder surface. The key here is to make sure there are no wrinkles on the bag when you press the wet backing material onto the flat surface so we make sure the backing is smooth and flat once it's dry.

Other options are silicon mats or clear acrylic flat sheets. We love the clear acrylic flat sheets as well, as they are reusable but you will need to take a lot of time cleaning them as the backing material might get stuck on the surface over time.
Again, with any of the above-mentioned surface options to hold and dry your backing material, in order to reuse them, be sure to make sure they are 100% clean and scrapped off any previous backing material.
Last tip but definitely not the least important one, wear a glove when you operate the mixes and apply backing to your slab! Safety first :)
We will include a comprehensive backing video for those who have enrolled in our lapidary courses. Please stay tuned!

Suggested Products
2 comments
Hi Keith,
Thank you for your feedback. We at Moose work hard to provide you the best information for lapidary work. Please shoot us an email instructor@tqmoose.com throughout your learning process if you have questions. We will be able to answer your questions on a timely basis. As we are experimenting with ways to improve our cutting process, we will be sharing any new discoveries we have with our students. Meanwhile, there is no one method fits all for lapidary so we always encourage you to try out new ways, and fail a few times before finding a better way to cut your stones. We encourage you to use this information as a basis for your learning and expand on that. Thank you so much and hope you have a wonderful journey with your lapidary work!
Good general information. I have the Devcon that i will be trying out. I am setting up my lapidary machine now & hope to be cutting cabs in the next week or so. I’ll send some pictures when up & running. I am enjoying the Academy classes having viewed them to get a general overview and will assemble a few questions when I review the classes again. Putting my studio together has been all consuming & I will be so relieved to get into the fun stuff again.


